
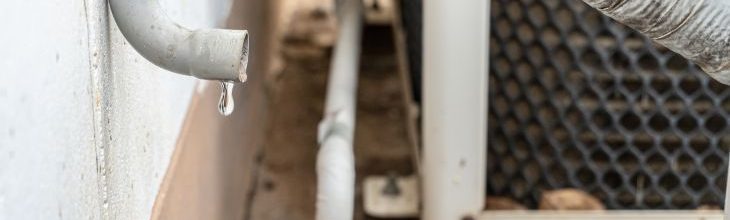
If you’ve ever walked past your AC unit and noticed a small puddle forming on the floor, there’s a good chance your AC drain pan is trying to tell you something — specifically, “Hey, I’m done.” And much like a leaky Tupperware container at a picnic, ignoring it is only going to make things worse.
The good news? Replacing an AC drain pan is one of those repairs you can actually tackle yourself — no engineering degree required. The better news? We’re going to walk you through the whole thing, step by step. Let’s dive in (not literally — please don’t step in the water).
What is an AC Drain Pan?
Your air conditioner does more than just cool your home. It also pulls moisture out of the air, which is especially important here in Central Florida, where the humidity could qualify as its own weather system. All that moisture has to go somewhere, and that “somewhere” is your AC drain pan (also called a condensate pan).
The drain pan sits directly beneath your indoor air handler and catches the condensation that drips off the evaporator coils. From there, the water exits through a condensate drain line. It’s a simple system — but when it fails, the results are anything but simple.
Why Would an AC Drain Pan Need to Be Replaced?
Drain pans are tough, but they’re not invincible. Here are the most common reasons yours might be ready for retirement:
- Cracks or holes: Over time, especially in older units, plastic drain pans can warp, crack, or develop small holes. The culprit is usually years of sitting in a warm, humid environment (sound familiar, Floridians?).
- Rust and corrosion: Metal drain pans — found in older systems — are particularly prone to rusting through entirely. Once they’re gone, they’re gone.
- Mold and algae buildup: Stagnant water in the pan creates the perfect spa environment for algae and mold. In some cases, the buildup becomes so severe that the pan is beyond saving (and your nose will be the first to know).
- Overflowing caused by a clogged drain line: If water has been repeatedly overflowing because of a clogged condensate drain line, the pan may have suffered water damage that requires replacement.
⚠️ Important Note on Older Systems (The R-22 Phase-Out): If your system uses a metal drain pan, there is a very high probability that your AC unit is an older model running on R-22 refrigerant (Freon). Because R-22 has been completely phased out due to environmental regulations, sourcing parts and servicing these units is becoming increasingly difficult and expensive. If you have an R-22 system, a leaking or rusted pan is often a major sign that it’s time to invest in a full system upgrade rather than throwing money at a component swap.
What You’ll Need
Before you get started, gather your supplies. Here’s your shopping list:
- Replacement drain pan (measure your existing pan or check your unit’s model number — fit matters here)
- Wet/dry vacuum
- Towels or a mop
- Screwdriver (flathead and Phillips)
- Bleach or white vinegar
- Gloves and safety glasses
- Headlamp or flashlight (attic installs can be dark and a little spooky)
How to Replace an AC Drain Pan: Step-by-Step Directions
Step 1: Turn off your AC system
This one’s non-negotiable. Flip the thermostat to “Off” and shut off the power at the breaker. No one’s impressed by working on live electrical equipment — including your future self.
Step 2: Locate the drain pan
In most Central Florida homes, the air handler is in the attic or a utility closet. The drain pan will be directly underneath the air handler unit. You may have a primary pan (attached to the unit) and a secondary overflow pan sitting below it. Both are worth inspecting.
Step 3: Remove standing water
Use your wet/dry vacuum to suck up any water sitting in the pan. Follow up with towels to get any remaining moisture. This is not the glamorous part — but it is a necessary one.
Step 4: Inspect and disconnect the drain line
The condensate drain line connects to the pan and runs to an exterior drain point. Gently disconnect it and check it for clogs while you’re in there. A little vinegar poured down the line is a great preventative measure.
Step 5: Remove the old pan
Depending on your unit, the pan may be secured with screws or simply slides out. Take note of how it sits before you remove it — you’ll want to replicate the same position with the new one. Snap a photo on your phone for reference.
Step 6: Clean the area
Before installing the new pan, wipe down the surrounding area with a bleach-and-water solution or white vinegar. Mold doesn’t deserve a fresh start just because you’re installing a new pan.
Step 7: Install the new drain pan
Slide the new pan into place, making sure it’s properly positioned to catch drips from the evaporator coils above. Reattach any screws and reconnect the drain line.
Step 8: Restore power and test
Turn the AC back on and let it run for 20 to 30 minutes. Check the new pan to confirm it’s collecting condensation normally and that the drain line is flowing freely. No puddles? Success. You’ve officially panned this repair.
When to Call Your Local HVAC Company
We’re all for the DIY spirit, but there are times when calling in a professional is the smarter (and safer) play:
- You’re not sure which pan to buy: If your unit is older or the model number is impossible to find, guessing on size can lead to an expensive second trip to the hardware store.
- You find mold inside the air handler: Mold beyond the pan itself means you’ve got a larger indoor air quality issue that needs professional attention.
- The drain line is severely clogged or damaged: A minor clog is DIY-friendly. A fully blocked or cracked line that’s been leaking for a while is a different story.
- Your secondary pan is overflowing regularly: This is a sign of a systemic problem — not just a one-time fix.
- You’re not comfortable working in the attic: Between the heat, the tight space, and the electrical components, attic air handlers are genuinely tricky. No shame in tapping out.
At Complete Air Mechanical, we handle drain pan replacements, condensate drain cleanings, and full system inspections — so you don’t have to go it alone. Whether it’s a quick fix or something bigger, we’ve got you covered (pan and all).
Call us today at (407) 915-0144 or schedule an appointment online.